We recommend reading the article on CRM Custom Tab Customisation before this one as many of the concepts are the same.
Salestracker allows you to customise all the contacts on the system with various items of information as required. For example, you might want to add an extra email address field to contacts or capture some extra notes about a contact.
You can add the following types of fields to your records:
- Drop-down menu selection – also for representing one selection from a set of values (e.g. 3 but not 1, 2, 4).
- Plain text – a number of single-line text fields, up to three lines (per section).
- Links – add a number of web addresses to external websites, up to three links (per section).
You can add up to six custom sections to contacts.
Adding contact custom sections will add a “Contacts” tab to the record view for all records.
How to Customise
Please note that this part of the tutorial only applies to users given advanced manager permissions on Salestracker.
First, go to “Preferences” in the top right. If you are a manager the Preferences page will show several tabs. Click on the section labelled “Contact Customisation” to expand it.
![]()
At the top of this section will be a series of options – click these to add field sections to your contacts.

Adding a drop-down menu:
Click the “+Add a drop-down section” link. You will see a box like the following appear underneath the options, like the following image.
![]()
- Label section – enter a name for this section here.
- Fields – add fields to this section here. The blue arrow next to each box can be clicked and dragged up or down to re-order the fields.
- Field area – enter the value for this field here.
- Delete button – remove this field.
- Add link – click this to add a field to this section.
- Remove link – click this to completely remove the entire section.
- Re-order alphabetically – click this to re-order all the fields alphabetically.
Adding text fields and link fields:
Click the section you wish to add. You will see a box like the following appear underneath the options, like the following image.
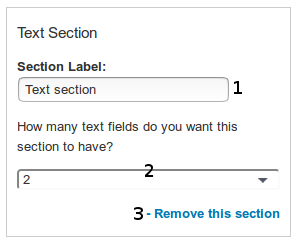
- Label section – enter a name for this section here.
- Fields – select the number of fields you want for this section here.
- Remove link – click this to completely remove the entire section.
Mixing and Matching
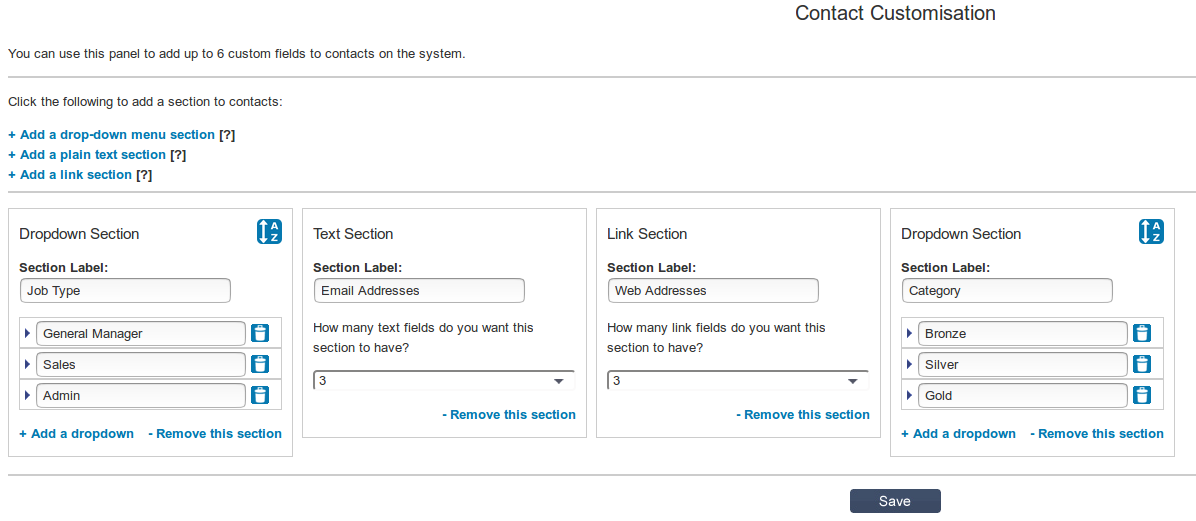
You can have as many of each section as required, in any order. If you only need one type of field, that’s fine! While editing you can also click and drag the sections to re-order them.
Customisations on the Record View
All customisations will translate through to the record view, allowing you to add extra data to a record. Please note that the behaviour of contacts changes based on whether you have contact customisations. By default (without any custom fields) records will show contacts at the bottom of the “Business” tab on a record:
![]()
When you add contact customisations this changes. Contacts get moved to their own tab to allow the new information to be shown in less restricted space.
To explain the interface, here is an annotated example from a Fenestration record:
![]()
- The box title on the left is the name of the contact. If they are the “primary” (i.e. main) contact then this will be highlighted with [PRIMARY].
- The box title on the right denotes whether the contact is a “public” one (i.e. one added by Insight Data) or a “private” one (i.e. one added by someone within your organisation). This will be highlighted with an icon – the crowd icon denotes a public contact, the padlock denotes a private one.
- The contact details. This includes general details as well as any custom field data you may have added. In this example Joe Bloggs has general details and some custom info, where as Anon Emous only has some general details.
- The “rubbish bin” icon is the delete button. It will only appear on private contacts and allows you to remove the contact permanently.
- The “pencil” icon is the edit button. It will only appear on private contacts and allows you to edit the general contact details.
- The “spanner and pencil” icon is the edit custom button. It appears on all contacts and allows you to edit custom fields for the contact.
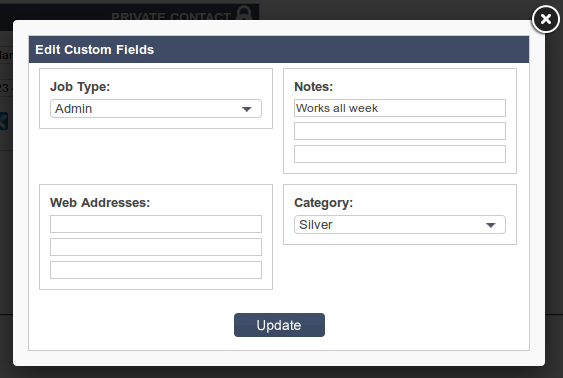
When clicking the edit custom button, a pop-up window will open to let you edit the details based on customisations you have set up:
Exporting Custom Data
Custom data you have entered can also be exported. When exporting any list, you should see the following option in the export options box:
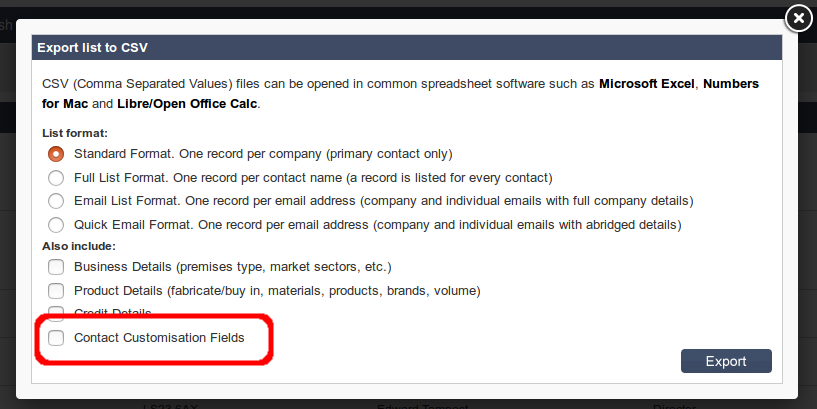
Tick this option and your custom contact data will also be exported. Please note that export performance is directly tied to the amount of data being exported, so the more customisations you have the slower the export will be when ticking this box!
