Please note this article only applies if you are subscribed to Salestracker’s CRM functionality, as the process described in this article cannot be followed if you are subscribed to the data-only version of Salestracker.
The records provided by the Insight Data team on the subscribed databases are known as “public” records – anyone subscribed to the Insight databases will potentially see these records. However, you can add your own “private” records to the system which can only seen by users on your subscription. These appear under “My Data” under saved lists.
Adding a Single Private Record
On the dashboard somewhere there will be a link for “+ Click here to add a new private record“. This will appear in a different place depending on which dashboard you have set (please note that the data dashboard will not have this link).

Clicking this link will take you to the private record creation page. Add the details of the company you wish to add in the left hand box and along the bottom.
![]()
The company name, first line of the address, region, contact first name, contact surname and contact position are required fields. Once you are happy with what has been entered, click the “Save Record” button at the top.
![]()
If the information entered meets requirements, the record will be saved and you will be taken to your new record’s record view to work with it like any other record. If it does not meet requirements, an alert will show at the top of the page detailing any errors present in the document. Make amendments based on the advice it gives and then click “Save Record” again.
Adding Multiple Private Records at Once
Salestracker has an upload feature that allows you to convert a CSV file of data into private records.
On the dashboard there will be a link for “+ Click here to import multiple records from CSV“. This will appear in a different place depending on which dashboard you have set (please note that the data dashboard will not have this link)
![]()
Clicking this will bring up the import page for importing multiple contacts at once using a CSV file
![]()
Please note the requirements outlined in the instructions above – in particular the required fields and the column labelled “companyname” (in lower case). Please make sure that the spreasheet you want to upload has the fields mentioned at minimum.
If you have a file that is not a CSV, many spreadsheet programs like Microsoft Excel allow you to save a spreadsheet in CSV format (usually by going to “File“, clicking “Save as” and then changing the file type at the bottom). Please consult the documentation for your preferred spreadsheet program in order to find out how to save as a different file type.

Click “Browse“, select the file you wish to upload, and then click the “Upload” button.
If the file passes the size and column requirements, you will be presented with a series of fields with drop-down menus:
![]()
The fields listed are the ones in Salestracker, and the drop-down menus contain the fields at the top of your spreadsheet.
![]()
The idea is to “map” the fields on your imported CSV to the fields in Salestracker. See the following image for an example.
![]()
Match up the fields in your CSV file to the fields in Salestracker. If you do not have an equivalent field, you can leave it on “– Select –” (required fields marked with an asterisk are an exception). Once you have mapped everything, click the “Next” button.
On the next page, pick a customer type from the dropdown, or click on add a new field to add a custom entry to the list, which will then be present in the dropdown to select.
Once you have selected a “Customer Type”, click the “Import records” button and Salestracker will attempt to import your records.

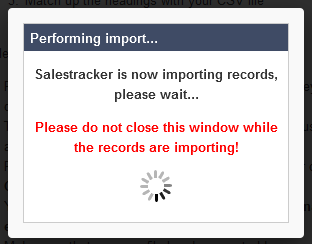
While this pop-up window is on screen, please do not close the window or navigate to another page (e.g. press the “Back” button). Doing so will interrupt the import and your records may not be imported correctly! The amount of time it takes for Salestracker to complete the import varies on the number of records in the file and possibly your internet connection speed.
Once imported, Salestracker will present you with a mini-report:
![]()
Any records that could not be imported will be listed in this mini-report in red. The usual cause for records not importing is missing fields in the file for those rows.
Adding / Removing Contacts on Private Records
While on the record view, contacts are shown at the bottom. Underneath the contacts table is a link for “Add a new private contact“.
![]()
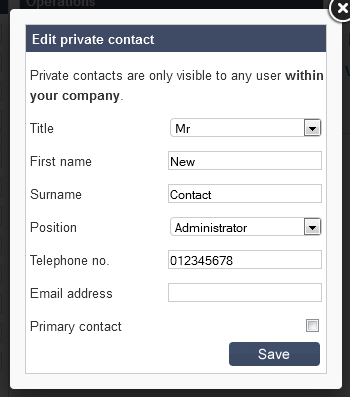
Click this to bring up a pop-up box. Fill in the contact’s details and then click “Save” to add the contact to your record.

To edit a contact, click the edit button next to the contact to bring up the window with the contact details in it – just change the details as required and click “Save“. To delete a contact, click the delete button – the system will ask if you are sure, click “OK” to confirm and remove the contact.
![]()
Editing Private Records
To edit a private record, bring up the record’s record view on screen (by searching, clicking within a list, etc.). On the “Business” tab there should be a box in the middle labelled “Operations“.
![]()
Click the “Edit record” button in this box. Salestracker will present you with a screen very similar to the “Create new record” page.
![]()
Change the record as you require and then click “Save” to record the changes. If there are errors the page will prompt you to change them and click “Save” again, otherwise it will return to the record view.
Deleting a Private Record
To delete a private record, open the “My Data” list under saved lists (it is usually inside the “Default Folder”).
![]()
While viewing the My Data list, every record will have a “Delete” button next to it. Find the record you want to remove and click this button.
![]()
You will be prompted to confirm your choice. Click “OK” to delete the record permanently. Please note that once the record is deleted it is gone forever and we cannot guarantee recovery of it at all.


